Ninja
5” HDR Video Monitor & Recorder
Current Firmware
Upgrading to AtomOS 11.18.00
New Features
Camera to cloud updates:
- Transition Atomos Cloud Studio customers to Mavis Cloud Hub
- Fix some reliability issues with ATOMOSphere and Frame.io uploads
For more information, please refer to the Release Notes for AtomOS 11.18.00.
Firmware Update Procedure:
Atomos recommends that your Ninja is plugged into mains power before commencing the firmware update.
- Insert a compatible, formatted SSD into the Docking Station.
- Unzip the downloaded file and copy the ATOMNJA.FW file to the root directory of the SSD.
- Eject the SSD according to operating system guidelines.
- Insert the SSD into the Ninja.
- If you have an Atomos Connect accessory, ensure this is connected to your device before powering on, as the module firmware will also need to be updated as part of this FW release.
- Power on the Ninja and the firmware update process will begin automatically.
Note: If your Ninja is already powered on, you will be prompted to perform the firmware update when a drive containing new firmware is inserted. - Once the update is complete, your Ninja will power itself down.
- Power your Ninja back on and the device will automatically start updating the Atomos Connect accessory.
- To verify if the firmware update was successfully completed, navigate to the main menu and scroll to the info tab.
For further information and troubleshooting, click here.
Previous Firmware
AtomOS 11.17.00
AtomOS 11.16.00
AtomOS 11.15.00
AtomOS 11.14.00
AtomOS 11.13.00
AtomOS 11.12.00
AtomOS 11.11.00
AtomOS 11.10.01
AtomOS 11.10.00
AtomOS 11.09.00
AtomOS 11.08.00
AtomOS 11.07.00
AtomOS 11.06.01
AtomOS 11.06.00
AtomOS 11.05.00
AtomOS 11.04.02
AtomOS 11.04.01
AtomOS 11.04.00
AtomOS 11.03.00
AtomOS 11.02.01
AtomOS 11.01.00
Resources
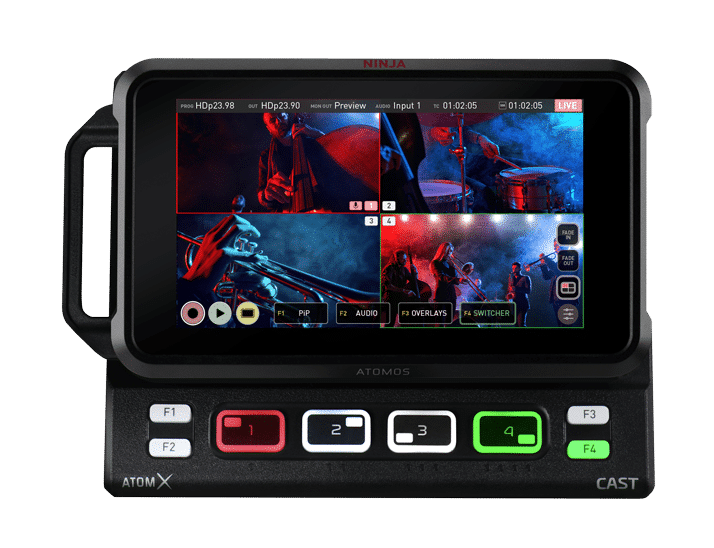
Ninja CAST
Go Live and Multicam with the Ninja CAST
Firmware information
NINJA CAST OWNERS: Please use Ninja V firmware to update your Ninja CAST to the latest OS Versions.
For more information, please refer to the Ninja V support area.
Resources
Ninja Phone
Ninja Phone works with the Mavis – Camera app. Download the latest version the Apple app store here.
Resources
Ninja TX
5” HDR Video Monitor & Recorder
Current Firmware
Upgrading to AtomOS 12.4.0
Major updates:
- Camera control support for Sony FX2
- Camera control support for Panasonic DC-S1RM2, DC-S1M2, DC-S1M2ES
- Camera control support for Nikon Z7II (Still Mode)
Fixes and improvements:
- Improved overall stability for UHD59.94 H.265 recording
- Improved WPA3 support
See www.atomos.com/ninja-tx-certified/ for supported storage & accessories.
For more information, please refer to the Release Notes for AtomOS 12.4.0.
Firmware Update Procedure:
Atomos recommends that your Ninja TX is plugged into a power source before commencing the firmware update (DC power supply, USB-C PD or battery eliminator).
- Unzip the downloaded file and copy the ATOMNTX.FW file onto a compatible, formatted CF Express card or USB-C SSD media.
- Insert or connect the media to the Ninja TX.
- With the Ninja TX powered on, navigate to the Firmware menu, and press the ‘Choose File…’ button.
- Select the file you copied to your chosen Media. The file will be copied onto the device, ready for installation, and the device will return to the Firmware menu.
- When you are ready to proceed, press the ‘Install’ button, and the installation process will begin.
- Once the Installation process has completed, the device will restart, running the new Firmware.
- To verify if the firmware update was successfully completed, navigate to the main menu and scroll to the info tab.
Ninja TX also offers Over-The-Air updates, for more info, see the Firmware tab on your Ninja TX.
Previous Firmware
AtomOS 12.3.0
AtomOS 12.2.1
AtomOS 12.2.0
AtomOS 12.1.2
AtomOS 12.0.3
AtomOS 12.0.2
AtomOS 12.0.1
Resources
Ninja TX GO
5” HDR Video Monitor & Recorder
Current Firmware
Upgrading to AtomOS 12.4.0
Major updates:
- Camera control support for Sony FX2
- Camera control support for Panasonic DC-S1RM2, DC-S1M2, DC-S1M2ES
- Camera control support for Nikon Z7II (Still Mode)
Fixes and improvements:
- Improved overall stability for UHD59.94 H.265 recording
- Improved WPA3 support
See www.atomos.com/ninja-tx-certified/ for supported storage & accessories.
For more information, please refer to the Release Notes for AtomOS 12.4.0.
Firmware Update Procedure:
Atomos recommends that your Ninja TX GO is plugged into a power source before commencing the firmware update (DC power supply, USB-C PD or battery eliminator).
- Unzip the downloaded file and copy the ATOMNTG.FW file onto a compatible, formatted CF Express card or USB-C SSD media.
- Insert or connect the media to the Ninja TX GO.
- With the Ninja TX GO powered on, navigate to the Firmware menu, and press the ‘Choose File…’ button.
- Select the file you copied to your chosen Media. The file will be copied onto the device, ready for installation, and the device will return to the Firmware menu.
- When you are ready to proceed, press the ‘Install’ button, and the installation process will begin.
- Once the Installation process has completed, the device will restart, running the new Firmware.
- To verify if the firmware update was successfully completed, navigate to the main menu and scroll to the info tab.
Ninja TX GO also offers Over-The-Air updates, for more info, see the Firmware tab on your Ninja TX GO.
Previous Firmware
AtomOS 12.3.0
AtomOS 12.2.1
AtomOS 12.2.0
AtomOS 12.1.2
Resources
Ninja Ultra
5” HDR Video Monitor & Recorder – AtomIC3 technology
Current Firmware
Upgrading to AtomOS 11.18.00
New Features
Camera to cloud updates:
- Transition Atomos Cloud Studio customers to Mavis Cloud Hub
- Fix some reliability issues with ATOMOSphere and Frame.io uploads
For more information, please refer to the Release Notes for AtomOS 11.18.00.
Firmware Update Procedure:
Atomos recommends that your Ninja Ultra is plugged into mains power before commencing the firmware update.
- Insert a compatible, formatted SSD into the Docking Station.
- Unzip the downloaded file and copy the ATOMNJU.FW file to the root directory of the SSD.
- Eject the SSD according to operating system guidelines.
- Insert the SSD into the Ninja Ultra.
- If you have an Atomos Connect accessory, ensure this is connected to your device before powering on, as the module firmware will also need to be updated as part of this FW release.
- Power on the Ninja Ultra and the firmware update process will begin automatically.
Note: If your Ninja Ultra is already powered on, you will be prompted to perform the firmware update when a drive containing new firmware is inserted. - Once the update is complete, your Ninja Ultra will power itself down.
- Power your Ninja Ultra back on and the device will automatically start updating the Atomos Connect accessory.
- To verify if the firmware update was successfully completed, navigate to the main menu and scroll to the info tab.
For further information and troubleshooting, click here.
Previous Firmware
AtomOS 11.17.00
AtomOS 11.16.00
AtomOS 11.15.00
AtomOS 11.14.00
AtomOS 11.13.00
AtomOS 11.12.00
AtomOS 11.11.00
AtomOS 11.10.01
AtomOS 11.10.00
AtomOS 11.09.00
AtomOS 11.08.00
AtomOS 11.07.00
AtomOS 11.06.01
AtomOS 11.06.00
AtomOS 11.05.00
AtomOS 11.04.02
AtomOS 11.04.01
AtomOS 11.04.00
AtomOS 11.03.00
AtomOS 11.02.01
AtomOS 11.01.00
Resources
Ninja V
5” HDR Video Monitor & Recorder
Current Firmware
Upgrading to AtomOS 11.18.00
New Features
Camera to cloud updates:
- Transition Atomos Cloud Studio customers to Mavis Cloud Hub
- Fix some reliability issues with ATOMOSphere and Frame.io uploads
For more information, please refer to the Release Notes for AtomOS 11.18.00.
Firmware Update Procedure:
Atomos recommends that your Ninja V is plugged into mains power before commencing the firmware update.
- Insert a compatible, formatted SSD into the Docking Station.
- Unzip the downloaded file and copy the ATOMNJV.FW file to the root of the SSD.
- Eject the SSD (according to operating system guidelines).
- Insert the SSD into the Ninja V.
- Power on the Ninja V and the firmware update process will begin automatically.
- If your Ninja V is already powered on, you will be prompted to perform the firmware update when a drive containing new firmware is inserted.
- Once the update is complete, your Ninja V will power itself down.
- To verify if the firmware update was successfully completed, power your Ninja back on, navigate to the main menu, and scroll to the info tab.
For further information and troubleshooting, click here.
Previous Firmware
AtomOS 11.17.00
AtomOS 11.16.00
AtomOS 11.15.00
AtomOS 11.14.00
AtomOS 11.13.00
AtomOS 11.12.00
AtomOS 11.11.00
AtomOS 11.10.01
AtomOS 11.10.00
AtomOS 11.09.00
AtomOS 11.08.00
AtomOS 11.07.00
AtomOS 11.06.01
AtomOS 11.06.00
AtomOS 11.05.00
AtomOS 11.04.02
AtomOS 11.04.01
AtomOS 10.94.01
AtomOS 10.94.00
AtomOS 10.93.00
AtomOS 10.92.01
AtomOS 10.92.00
AtomOS 10.90.01
AtomOS 10.90.00
AtomOS 10.84.1
AtomOS 10.84.00
AtomOS 10.83.00
AtomOS 10.82.00
AtomOS 10.81.00
AtomOS 10.80.00
AtomOS 10.77
AtomOS 10.76
AtomOS 10.75
AtomOS 10.74
AtomOS 10.73
AtomOS 10.72.1
Resources
Ninja V+
5” HDR Video Monitor & Recorder – AtomIC3 technology
Current Firmware
Upgrading to AtomOS 11.18.00
New Features
Camera to cloud updates:
- Transition Atomos Cloud Studio customers to Mavis Cloud Hub
- Fix some reliability issues with ATOMOSphere and Frame.io uploads
For more information, please refer to the Release Notes for AtomOS 11.18.00.
Firmware Update Procedure:
Atomos recommends that your Ninja V+ is plugged into mains power before commencing the firmware update.
- Insert a compatible, formatted SSD into the Docking Station.
- Unzip the downloaded file and copy the ATOMNJP.FW file to the root of the SSD.
- Eject the SSD (according to operating system guidelines).
- Insert the SSD into the Ninja V+.
- Power on the Ninja V+ and the firmware update process will begin automatically.
- If your Ninja V+ is already powered on, you will be prompted to perform the firmware update when a drive containing new firmware is inserted.
- Once the update is complete, your Ninja V+ will power itself down.
- To verify if the firmware update was successfully completed, power your Ninja back on, navigate to the main menu, and scroll to the info tab.
For further information and troubleshooting, click here.
Previous Firmware
AtomOS 11.17.00
AtomOS 11.16.00
AtomOS 11.15.00
AtomOS 11.14.00
AtomOS 11.13.00
AtomOS 11.12.00
AtomOS 11.11.00
AtomOS 11.10.01
AtomOS 11.10.00
AtomOS 11.09.00
AtomOS 11.08.00
AtomOS 11.07.00
AtomOS 11.06.01
AtomOS 11.06.00
AtomOS 11.05.00
AtomOS 11.04.02
AtomOS 11.04.01
AtomOS 10.94.01
AtomOS 10.94.00
AtomOS 10.93.00
AtomOS 10.92.01
AtomOS 10.92.00
AtomOS 10.90.01
AtomOS 10.90.00
AtomOS 10.84.1
AtomOS 10.84.00
AtomOS 10.83.00
AtomOS 10.82.00
AtomOS 10.81.00
AtomOS 10.80.00
AtomOS 10.77
AtomOS 10.76
AtomOS 10.75
AtomOS 10.74.1
AtomOS 10.73
AtomOS 10.72.1
AtomOS 10.72
AtomOS 10.71
AtomOS 10.68
AtomOS 10.67.1
AtomOS 10.67
AtomOS 10.66
AtomOS 10.65
Resources
Join the Atomos Community!
Sign up to get the latest Atomos news, filmmaking tips, firmware updates, and early access to new products and cloud tools.